Installing a front door is an essential project that not only enhances your home’s curb appeal but also increases its energy efficiency and security. With the right tools, preparation, and knowledge, homeowners can successfully install a front door without professional assistance. This guide will provide you with step-by-step instructions to make the process straightforward and manageable.
Tools and Materials Needed
- Measuring tape
- Screwdriver or drill
- Level
- Pry bar or crowbar
- Hammer
- Saw (if resizing is needed)
- New front door (pre-hung or slab style)
- Screws or nails (depending on your frame type)
- Shims for alignment and leveling
- Weatherstripping materials
- Caulk or sealant
Pre-Installation Preparation
- Measure the Door Frame: Use a measuring tape to record the width, height, and thickness of your existing door opening. Ensure accuracy to avoid issues with fitting the new door.
- Choose the Right Door Type: Select between pre-hung doors (with frame attached) or slab doors (door-only replacements). Pre-hung doors are easier for most DIY projects.
- Clear any obstacles near the entrance, such as furniture or decor items.
- Lay down protective sheets to prevent scratches on your floors.
Step-by-Step Installation Process
Step 1: Remove the Old Door
- Use a screwdriver or drill to remove hinges from your existing door.
- Carefully take down the door from its hinges without damaging surrounding trim.
- If replacing the frame too, use a pry bar to remove old jambs and molding.
Step 2: Inspect & Prepare Your Rough Opening
- Check for any signs of damage around the rough opening (e.g., wood rot). Repair these areas before proceeding.
- Test fit your new door in the opening to ensure it matches properly.
Step 3: Install New Frame (For Pre-Hung Doors)
- Position the pre-hung frame into place within the rough opening.
- Insert shims along both sides of the frame to ensure it’s level and square.
- Securely fasten screws through pre-drilled holes in both sides of the jamb.
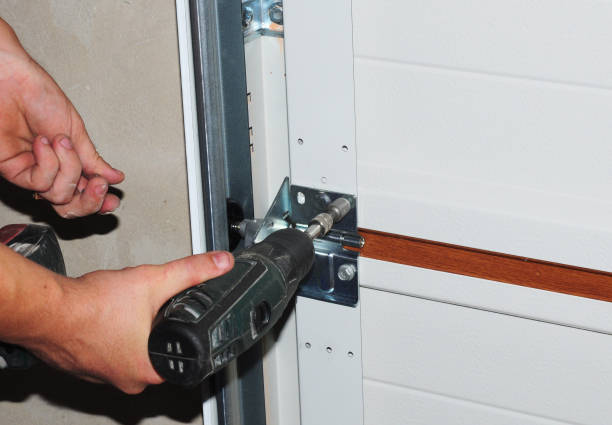
Step 4: Hang & Align Your New Door
- Attach hinges from your new door onto its corresponding frame using screws provided by the manufacturer.
- Check alignment by opening/closing it multiple times; adjust shims if necessary.
Key Tips for Lasting Results
To ensure durability after installation: 1. Apply weatherstripping around edges of doors for improved insulation against drafts/water seepage. 2 . Seal gaps with durable caulking
Complete Guide on Door Installation Rockville, MD: Steps for Your Home
Nova Exteriors Door Installation Rockville, MD
+13013967509
Installing a front door is not only about improving your home’s aesthetics but also about ensuring security and energy efficiency. To help you navigate the process, this guide breaks down each step required to install a front door properly. By following this structured approach, you can achieve a professional-quality installation that enhances both the look and functionality of your entryway.
Tools and Materials Needed
Tools: – Measuring tape – Level – Hammer – Screwdriver (manual or powered) – Pry bar – Power drill with bits – Saw (jigsaw or hand saw) – Utility knife – Caulking gun
Materials: – New pre-hung door or slab door – Screws and nails (as specified in your installation kit) – Shims – Insulating foam sealant – Weatherstripping material – Paint or finish (optional)
Step 1: Measure and Inspect the Door Frame
Accurate measurements are critical to ensuring your new door fits perfectly. Use a measuring tape to determine: 1. The width of the opening. 2. The height from floor to top of the frame. 3. The depth of the jamb.
Check if the frame is level and square using a level tool. If it’s not aligned, adjustments may need to be made before proceeding.
Step 2: Remove the Old Door
Removing your existing door is an essential preparatory step: 1. Open the door slightly and remove hinge pins using a hammer and screwdriver. 2. Lift the old door off its hinges carefully. 3. Use a pry bar to remove any trim or casing without damaging surrounding walls. 4. Inspect for damage around the frame, such as rot or cracks, and repair if necessary.
Step 3: Dry-Fit Your New Door
Before permanently installing, dry-fit your new front door: 1. Place it in position within the frame. 2. Check all sides for proper clearance—there should be an even gap around all edges. 3. Use shims if needed to level out uneven sections.
This step ensures that all adjustments are made before securing hardware.
Step 4: Install Hinges and Hardware
If you’re installing a slab door (not pre-hung), you’ll need to attach hinges manually: 1. Mark hinge locations on both the jamb and edge of the new door using measurements from your old setup. 2. Chisel out shallow recesses in both areas so hinges sit flush. 3. Secure hinges with screws.
For pre-hung doors, most hardware will already be attached.
Step 5: Mount Your Door into Place
Once ready, follow these instructions to install: 1. Align one side of your new front door with its corresponding hinge jamb. 2. Insert screws through pre-drilled holes on each hinge into their matched positions on framing studs. 3. Close and open repeatedly while tightening screws until optimal alignment is achieved.
Enhancements Post Installation
| Task Type | Method |
| Sealing Gaps | Apply foam insulation where gaps visible sealing drafts nearby ensures weather-resistance |
Essential Tips for Door Replacement in Rockville, MD: Preparing for a New Front Door
Removing the old door is a critical step in the door installation process. It not only creates space for your new front door but also helps you inspect the frame and surrounding area for potential issues like rot or damage. Follow these key steps to ensure this task is completed efficiently and safely.
Tools You’ll Need
- Hammer or mallet
- Screwdriver set (manual or powered)
- Utility knife
- Pry bar
- Tape measure
- Safety glasses and gloves
Step 1: Assess and Prepare the Area
- Clear Surrounding Space: Remove any furniture, decorations, or obstructions near the doorway. This will provide ample room to work safely and efficiently.
- Measure Your Current Door: Use a tape measure to note down the height, width, and thickness of your existing door. These measurements will help ensure your new door fits properly.
- Inspect for Damage: Check for signs of rot, cracks, or structural issues in both the door frame and surrounding wall material. Address these problems before installing a new door.
Step 2: Remove Hinges and Pins
- Loosen Hinges: Using a screwdriver or drill, remove the screws securing each hinge leaf on the door side first.
- Remove Hinge Pins (If Applicable): For doors with removable hinge pins, use a hammer and pin punch to gently tap them out from below.
- Detach Hinges from Frame: Once hinge pins are removed (or screws are loosened), carefully lift the existing door off its hinges with assistance if needed.
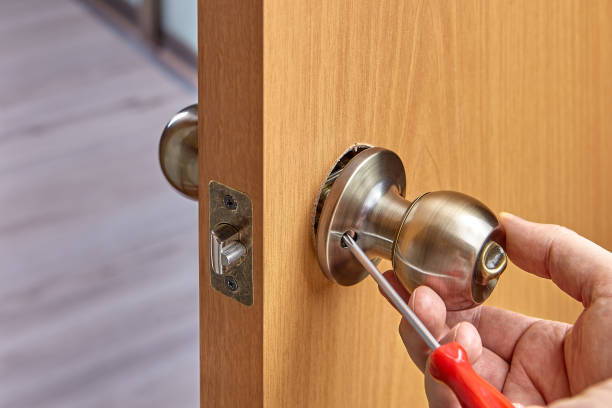
Step 3: Take Off Door Hardware
- Unscrew Locks and Knobs: Use an appropriate screwdriver or drill bit to remove screws securing these components.
- Label Items for Reinstallation: If keeping hardware for later use, label each piece clearly so it’s easy to reassemble later.
Step 4: Remove Trim and Weatherstripping
- Cut Along Trim Edges: Run a utility knife along trim edges where they meet walls to prevent paint chipping when you remove them.
- Pry Loose Trim Gently: Insert a pry bar behind wood trim sections starting at corners; apply steady pressure while working outward toward longer edges.
- If damaged/worn out -> discard completely
- If intact & reusable -> store securely until reinstalling
Step 5: Detach Door Frame and Jamb (If Necessary)
1) Locate nails/screws anchoring jambs into studs within adjacent walls then carefully extract fasteners one-by-one using claw hammer screw gun etc ensuring minimal collateral structural disturbance nearby areas removed material disposal responsibly
Removing the Old Door: Key Steps to Prepare for a New Front Door
Properly removing an old door is a critical step in preparing for the installation of a new front door. Skipping or rushing through this phase can lead to issues with alignment, structural integrity, and even security. Below is a detailed guide for safely and efficiently removing your old door while ensuring the workspace is ready for the installation process.
Gather Tools and Materials
- Screwdriver (manual or electric drill with screwdriver attachments)
- Hammer
- Pry bar or crowbar
- Utility knife
- Measuring tape
- Saw (if trimming is required around the frame)
- Safety glasses and gloves
Having these materials prepared beforehand will make the process smoother and safer.
1. Inspect the Existing Door Frame
Start by inspecting your current door and frame. Check for any signs of damage, rot, or warping that may impact removal efforts. Ensure that the surrounding trim or molding can be removed without causing unnecessary damage to walls.
2. Remove Door Hardware
Take off all hardware from your existing door such as handles, locks, knobs, deadbolts, and hinges: – Unscrew each component carefully using a screwdriver. – If reusing some hardware (e.g., hinges), store them in a labeled container to prevent loss. – For older doors with painted-over screws, use a utility knife to scrape excess paint before unscrewing.
3. Detach Hinges from Frame
With the door closed, locate all hinge pins: – Tap out hinge pins using a hammer and nail punch or flathead screwdriver. – Start at the bottom hinge and work upward to prevent sudden stress on remaining hinges as you detach them. Once all pins are removed, carefully pull the door away from the frame.
4. Remove Trim or Molding Around Frame
Using a utility knife: 1. Score along edges of interior trim where it meets drywall to avoid paint chipping. 2. Insert a pry bar between trim pieces gently loosening them from nails or adhesive. For exterior trim removal (if applicable), be cautious not to damage siding during this step.
5. Detach Old Threshold (if applicable)
If your new front door comes with its own threshold base: 1. Use a pry bar under existing threshold edges while applying gentle force upward until detached entirely. 2. Examine subfloor beneath—repair any uneven spots before proceeding further during future installation stages.
Table: Quick Reference on Common Tools & Their Uses
| Tool | Purpose |
| Screwdriver | Removing screws from hinges/door hardware |
| Pry Bar | Loosening trim pieces without unnecessary wall damage |
| Utility Knife | Scoring paint lines along trims & slicing adhesives cleanly |
Preparing Workspace for New Installation
After successfully removing most components related directly tied-to old doors setup – prep workspace ensuring surfaces are clean-flat aligned ready seamlessly accommodating newer configurations replacement units snug functionality optimal placement
Installing and Aligning Doors in Rockville, MD for a Perfect Fit
Properly fitting and aligning your new front door is essential to ensure it operates smoothly, looks aesthetically pleasing, and provides security. This process requires careful attention to detail and precise adjustments. Below is a step-by-step guide to help you align your front door perfectly.
Tools and Materials You’ll Need
- Screwdriver (manual or electric)
- Level
- Measuring tape
- Shims (wood or plastic)
- Hammer
- Adjustable wrench
- Pencil or marker for marking adjustments
Step 1: Position the Door in the Frame
- Place the Door in the Opening: Begin by positioning the door within the existing or newly installed frame. Ensure it fits well without any significant gaps around its perimeter.
- Use Shims for Support: Insert shims at various points along the top, bottom, and sides of the frame to hold the door in place temporarily as you work on alignment.
Step 2: Check for Proper Leveling
To ensure your door functions correctly: – Use a Level: Place a level along all sides of the door—top, bottom, and both sides—to confirm it’s straight both vertically (plumb) and horizontally (level). – Adjust with Shims as Needed: If there’s unevenness, add shims incrementally where needed until the level indicates a straight alignment.
Step 3: Secure Hinges to Anchor Alignment
- Attach Hinges Loosely First: Mount each hinge starting from top to bottom but avoid tightening screws fully at this stage.
- Test Hinge Alignment: Open and close the door gently to ensure smooth movement without resistance or scraping against the frame.
- Tighten Hinge Screws: Once alignment is correct, secure all hinge screws firmly using a screwdriver or drill.
Step 4: Adjust Margins Around Door Edges
The gap between your door and frame—often referred to as “reveal”—should be even on all sides: – Measure gaps around all edges of the closed door using a ruler or visual inspection. – If gaps are inconsistent, remove or reposition shims accordingly until uniform spacing is achieved (typically about ⅛ inch).
| Edge of Door | Ideal Gap Size | Adjustment Action |
| Top | ~⅛ inch | Add/remove shims at top corners |
| Bottom | ~½ inch* | Trim bottom edge if needed (*for floor clearance) |
| Sides | ~⅛ inch | Adjust side shims accordingly |
Step 5: Test Door Functionality
Once aligned: 1. Open and close your door several times to check for smooth motion. 2. Ensure there’s no sticking, dragging on flooring, or uneven contact with weatherstripping.
Common Issues During Alignment (and How to Fix Them)
- Door Scrapes Floor: Trim excess material from the bottom edge if clearance space is insufficient.
- One Side Tighter Than Other: Adjust side shims carefully until spacing evens out.
- Door Doesn’t Stay Closed: Realign hinges slightly using their adjustable slots or tighten screws more securely.
Proper fitting ensures that not only does your front door look great but also enhances its functionality over time while maintaining energy efficiency by reducing drafts through poorly aligned gaps.
Expert Door Company Rockville, MD: Enhancing and Finishing Your Front Door
Once your new front door has been fitted and aligned, the final steps of sealing, finishing, and enhancing are essential to ensure durability, energy efficiency, and aesthetic appeal. This process not only protects your investment but also adds the finishing touches to make your door functional and visually pleasing.
The Importance of Proper Sealing
- Inspect for Gaps: After installation, check around the edges of the door for any visible gaps between the frame and wall. Even small openings can compromise insulation.
- Apply Weatherstripping: Install weatherstripping along all four sides of the frame. Common materials include rubber or foam strips that compress when the door is closed.
- Pro Tip: Choose adhesive-backed weatherstripping for ease of installation.
- Use a Door Sweep: Attach a durable door sweep at the bottom edge to block drafts and prevent debris from entering.
- Caulk Around Exterior Trim: Use exterior-grade caulk to seal cracks or crevices where the trim meets siding or brickwork.
Finishing for Protection and Appearance
For Wooden Doors:
- Sand down any rough surfaces for smoothness.
- Apply a primer coat if you plan to paint it; this ensures better adhesion.
- Use high-quality exterior paint or wood stain for long-lasting protection against weather elements.
- Finish with a clear sealant or varnish to enhance durability while highlighting natural wood grain (if stained).
For Fiberglass Doors:
- Clean with mild soap water before applying paint or gel stain designed specifically for fiberglass surfaces.
- Avoid abrasive cleaners that could damage its surface.
For Steel Doors:
- Prime bare metal areas with rust-resistant primer if necessary.
- Use exterior-grade paints formulated for metal surfaces.
Additional Enhancements
- Install Decorative Hardware: Consider adding stylish doorknobs, handlesets, hinges, or kickplates that complement your home’s design theme.
- Example: Brushed nickel hardware pairs well with modern styles; oil-rubbed bronze suits traditional aesthetics.
| Hardware Type | Best Material Options | Style Preferences |
| Doorknobs & Handlesets | Solid Brass / Stainless Steel | Modern / Classic Styles |
| Kickplates | Brass / Bronze / Aluminum | Ornamental or Simple Look |
Upgrade Locks: Opt for deadbolts with smart locking features for enhanced security without compromising style.- Add Decorative Glass Panels: Adding frosted or stained-glass panels can allow natural light while maintaining privacy.
Ongoing Maintenance Tips
To keep your newly installed front door performing optimally over time: – Regularly inspect seals/weatherstripping every six months; replace worn sections promptly. – Reapply exterior finishes every 2–3 years depending upon exposure conditions like sunlight intensity & rainfall frequency near the locale.
- Step-by-Step Guide to Door Repair Rockville, MD: Tips for Homeowners
- Door Installation Rockville, MD: A Complete Guide to Installing a Door in 8 Steps
- Expert Tips and Tricks for Door Replacement Rockville, MD
- 6 Essential Factors to Consider When Replacing Doors in Rockville, MD
- Fixing Common Doors Rockville, MD Problems: Causes and Solutions
- Choosing the Right Door Installation in Rockville, MD for Your Needs
- Step By Step Guide to Expert Entry Door Installation in Doors Rockville, MD